Teaching online — a piece of cake? 教网课 —易如反掌?

Someone who obviously never taught a single class commented that “teaching online is easy”. How wrong this person is? Check out my sharing!

It is definitely not a piece of cake to teach online! I know. This is because I had taught for over thirty months online.

网上教学绝对不是一件轻而易举的事! 为何我有此见解?这是因为我在网上教了三十多个月。

I was (until the end of July 2022) engaged as a full time teaching staff of Zhaoqing University, Guangdong Province, China (ZQU). I came home for a short winter break in January 2020, well “Mr. COVID-19” messed up a lot of lives and things, including my return from Malaysia to teach in China! In this rather long post I try to share my own experiences and learning in conducting delivery of classes online (and supervision of students’ graduation thesis work remotely in Part 2). 

从2019年3月直至2022年7月底我是在中国广东省肇庆学学院任教。2020年1月我从肇庆回乡(马来西亚)过了一个短暂的寒假,新冠肺炎的发生毁了很多人的生活和策划,包括我回中国教学的计划!在这篇相当长的文章中,我试图分享我自己在在线授课方面的经验和学习(在第二部分我将分享远程指导学生的毕业论文的经验)。

Prelude to the online teaching stint 网络教学的序幕

With the new semester fast approaching, in late January 2020 I received instructions from the International Office of ZQU to NOT return to campus. I guess we were luckier than most as I was able to cancel my wife’s and my AirAsia tickets on time to get a refund. By late February 2020, all my Taiwanese colleagues who had gone home (Taiwan) for the winter break and yours truly were getting anxious. One of our China colleagues, Mr. Yan Dan Feng was even stuck at his home town near Wuhan, the epicenter of the COVID-19 outbreak. We all really did pray from his (and his family’s) safety!

随着新学期的临近,2020年1月下旬,我接到了我校国际处的指示:不得回校园! 我想我和我”另一半“比大多数卡在乡的人都幸运,因为我能够及时取消我们的亚航机票,获得退款。到了2020年2月底,我校所有回乡过寒假的同事(包括本人)开始焦虑了。我们的一位同事,严丹峰先生甚至被困在位于新冠肺炎疫情严重区的武汉附近的家乡。我们都真的为他(和他的家人)的安全祈祷!

Finally, in early March 2020, with students and many staff not being allowed to return to the campus the leadership of ZQU finally received the green light from the power that be to allow all classes of the new semester (Spring 2020) to be delivered online. The scrambles for gears and internet bandwidth began at every academic’s and student’s household.

最后,在2020年3月初,由于学生和许多教工人员都不被允许返回校园,我校领导层终于收到了有关部门的“绿灯”,允许新学期(2020年春)的所有课程在线授课。每个教学者,学生和他们的家庭对网络设备和互联网带宽的争夺也开启了。

A shaky start to my online teaching class 我的在线教学课程的一个不稳定的开始

It happened that both Mr. Yan Dan Feng and I were assigned to teach the same course (管理学概论 – Introduction to Management Science) to two different classes. To make life easier for both of us, Mr. Yan and I had decided to merge the two classes (luckily the two classes’ respective timetables did not clash). I would be doing the lecturing while Mr. Yan would be working behind the “scene” to trouble shoot and observe students’ performance. Prior to this, with the help of the class leaders (yes we did have class monitors班长; class learning committee members学委; and class discipline committee members纪委) we had sorted out the online chat groups for classes in the platforms described below. So communicating with our students was more or less settled, so we thought!

碰巧在2020年3月我和严丹峰先生都被排到两个不同班的教同一门课,“管理学概论“。为了更有效的教学我们俩决定合并这两个班(幸运的是两个班各自的时间表没有冲突)。我负责讲课,而严老师则在“幕后”工作,解决各项问题并观察学生的表现。在此之前,在各个班的班长/学委的帮助下,我们已经整理出了所运用的线上平台中的在线聊天群。所以我们与我们的学生交流课题大致上都解决了,但这只是我和严老师的想法而已!

Imagine this scene 想象一下这样的场景:

  • Locations of lecturers —- one in Subang Jaya, Selangor, Malaysia; one in his hometown close to Wuhan in China. 
    讲师所在地点: 一位老师在马来西亚雪兰莪州梳邦再也,一位在靠近中国武汉的家乡。
  • Locations of students —- in their respective homes, scattered throughout Guangdong Province. Some would be in cities or towns with good internet connections while a good number would be at their home villages remotely located (internet connection and bandwidth were issues).
    学生所在地: 在各自的家里,分散在广东省各地。一些人住在有良好网络连接的城镇,而很多人则住在偏远的家乡。(互联网连接和带宽可能具有问题)。
  • Online teaching platforms —- DingTalk (for live broadcast), Rain Classroom (a PowerPoint add-on from Qinghua University, as the in-class interaction engine), and QQ Group Chat (as the backup live broadcast platform). While WeChat remained the only direct link between the class leaders and the lecturers (we did not want the rest of the students onto this WeChat group to complicate matters), the rest of the class had to communicate with the teaching staff using DingTalk (backed up by QQ Group Chat). We did have another option: Tencent Meeting (腾讯会议) but this platform was a bit more complicated for me to use. So we ruled it out.
    在线教学平台钉钉(直播)、雨课堂(清华大学PowerPoint插件,作为课堂互动引擎)和QQ群聊(作为备用直播平台)。虽然微信仍然是班长/学委和老师之间唯一的直接联系方式(我们不想让其他学生加入这个微信群,让事情变得复杂),但班上其他人必须使用钉钉(QQ群聊为备用平台)与教师交流。我们确实有另一个选择,腾讯会议,但是当时我们觉得该平台的操作是有点复杂。所以腾讯会议被排除了。
Dingtalk 钉钉 - one of the most versatile online broadcast/teaching platforms
QQ Chat app, one of the most popular chatting app for youngsters in China
Tsinghua University's Rain Classroom
WeChat for Web


The first class was chaotic to say the least. The first 30 minutes of class was “eventless”. We started a few minutes late as my teaching partner and I had to do a headcount of the number of students who signed in on our two classes. Luckily DingTalk allowed the “merging” of the two class groups into one for direct broadcast of my lecture. Hence we saved a lot of work in this merging so that my teaching partner could “supervise” the students and monitor them while I concentrated on the delivery.

我们网课的第一堂课可以说是蛮混乱的。上课的头30分钟“波澜不惊”。我们只是迟了几分钟开课,因为我和严老师不得不清点两个班的学生人数。幸运的是,钉钉在直播平台允许我们”合拼”两个班级为一个直播流的演示。因此,我们在这次合并中节省了大量的工作,这样严老师就可以专注“监督”学生上课的情况,而我则专注于课程的演示。

Then our trouble started: some of the students reported that they were unable to get a good connection to DingTalk and on my end, with my own monitoring, I was informed by DingTalk that the connection I had was shaky. Thus collectively, Mr. Yan and I (with the help of the leaders of the two classes) had to inform our lot to “switch to QQ Chat Group”.

然而不久后,我们的麻烦开始了:一部分学生报告说,他们无法很好地连接到钉钉。在我这边,我接到钉钉系统报告说我与钉钉服务器的联系是不可靠的。因此,严老师和我(在两班的班长/学委的帮助下)不得不通知学生们“切换到QQ聊天组”。

So we continued on QQ Group Chat direct broadcast (it was more like video group chat). The thing was, on QQ unlike DingTalk, I could not mute the microphones of the students. Despite Mr. Yan’s urging at the “back” of the online class for everyone to “mute your mic”, during the 90 minutes class, we had many instances of interfering sounds: door slamming, people talking, traffic noise. It was to be expected as our students were all stuck at home, some would have to share facilities with siblings etc. Compound this issue with the fact that not all students were having access to stable and good internet connections and most had to use their mobile phones to attend classes.

于是我们继续在QQ群上聊天直播(当时更像是视频群聊)。事情是这样的,在QQ平台上,不像钉钉,我不能把学生的麦克风静音。尽管严老师在网络课堂的“后面”敦促大家“把麦克风静音”,但在90分钟的课程中,我们还是听到了很多干扰的声音:开门声、说话声、交通噪音等等。这是意料之中的,因为我们的学生都被困在家里,一些同学将不得不与兄弟姐妹等共用设施。此外,并非所有学生都有稳定良好的互联网连接,并且大部分学生不得不使用手机上课。

Nevertheless, we were still able to carry on with our class. Then our next major trouble started!

尽管如此,我们仍然能够继续上课。然后我们的下一个大麻烦开始了!

One of the female students decided to read her Chinese literature lesson out loud in my online class. Reading out loud is one way of learning Chinese literature but one would be well advised to do it when one is in solitude! So we had 80 students in the online class, 79 of whom was tuned in to my class with one blabbing away and “fighting” with me for the attention of her course mates! Despite my repeated requests to my students to “check your mic and mute your mic NOW“, the blabbing female student was not listening and she continued! It took the combined efforts of Mr. Yan and our class leaders a good 15 minutes to locate this “blabbing” person! So my “reserve” platform was not a viable alternative after all!

其中一名女生决定在我的网上课上大声朗读她的中文文学课件。大声朗读是学习中国文学的一种方式,但最好是当一个人独处时做!所以我们有80位在线的同学,其中79人用心上我的网课,可是其中一个人与我在吸引同学们的注意力上“竞争”!尽管我一再要求我的学生“检查你的麦克风,现在就静音“,在朗读的那位同学没在听,她继续在朗读!严老师,我们两班班长和学委花了整整15分钟才找到这位朗读女生!所以我的“后备”平台, QQ群聊根本不是一个可行的选择!

At that time (March 2020) Rain Classroom did not have a working live broadcast function, and I should have used Tencent Meeting (腾讯会议) as the backup. Lesson learned!

当时(2020年3月)雨课堂还没有实时直播功能,我应该用腾讯会议作为备选平台。我又上了一课!

In addition, March 2020 was the time when all educational institutions in China (from primary all the way to tertiary institutions) were teaching their students online. Bandwidth and other internet resources were stretched to the limits. Hiccups were to be expected. But true to the efficiency in which China technology companies were operating, most obliged to contribute during the nation’s critical needs and solved most technical glitches effectively. Hence within a few days most of these hiccups were more or less ironed out.

此外,2020年3月,中国所有的教育机构(从小学到高校)都开始在线教育学生。带宽和其他互联网资源被用到了极限。发生故障是意料之中的。但实际上,中国科技公司的运作效率很高,大多数公司在国家的关键需求期间都有义务做出贡献,并有效地解决了大多数技术故障。因此,在几天之内,各个平台大多数的故障或多或少都得到了解决。

August 2020 – the return of staff & students on campus, but NOT ME! 2020年8月-教职员工和学生重返校园,但不包括我!

It was August 2020. All my Taiwanese colleagues received the order to return campus (subject to quarantine measures — this was a nightmare for many at the start, being “caged up” for weeks etc.). By then, my Zhaoqing City resident permit had expired. I needed a special letter of invitation from the provincial authority to get an entry visa. That took over 10 weeks to obtain. When this letter finally arrived, my rush to the Kuala Lumpur China Embassy’s visa centre proved to be fruitless – the nice manager at the visa centre advised us that the China authority were closing the boarder and even if we could get our visa, there were few flights (that cost at least ¥9,000 or around MYR5,625, but mostly in the ¥35,000 range for chartered flights) available. So I had to break the bad news to my colleague at the International Office of ZQU taking care of my case, Ms Zeng. All her great efforts in rushing around and chasing the special invitation letter for me was wasted!

到了2020年8月, 又是一个学期的开启。我校所有的台湾同事都接到了返回校园的命令(他们必须接受隔离措施–这对许多人来说是一场噩梦,一开始就被“关”了几个星期,等等)。当时,我的肇庆市居留许可证已经过期了。我需要省级主管部门的一封特别邀请函才能获得入境签证。这封信函需要花了十多周才可以办妥。当这封信最终到达我手时,我匆忙赶到吉隆坡中国大使馆的签证中心,但并没有获得我急需的结果—-签证中心的一位经理告诉我们,中国当局正在关闭其边境,即使我们能拿到签证,也几乎没有航班(至少花费¥9000或约马币5625,可能只有包机航班其机票大多在¥3.5万元的范围内)。所以我不得不把这坏消息告诉我校国际处处理我的案子的同事,曾老师。她为我奔波追逐这封特别邀请信的所有努力都白费了!

I was fortunate to have very accommodating and kind leaders at my School of Life Sciences. The leadership took up my case to the power that be at ZQU and convinced them to grant me the privilege of being the only academic staff (one out of 2000) to be allowed to continue to teach online. Of course there were many rules /arrangements that I had to adhere to. Some of these were:

但是我也很幸运,我院,生命科学学院有非常和蔼可亲的领导班子。我院领导们接受了我的恳求,并说服学校的领导给予我教学特权,让我成为唯一被允许继续在线教学的教学人员。当然,我必须遵守许多规则/安排。其中一些是:

  • All my online classes must be delivered at the assigned classroom on campus and students must attend in person (that is, students must gather at the assigned time and venue as per ‘normal’ classes)  
    我所有的在线课程都必须在校园内教务处指定的教室授课,学生必须亲身到课室上课(也就是说,我的学生必须按照“正常”课程在指定的时间和地点上课)。
  • My School must arrange for another staff to be in attendance who would supervise my students during class (监督老师). I was delegated the task of find volunteers to fill up this role. Luckily the four Taiwanese colleagues at my School volunteered to help out and they enlisted other staff to back them up too. 我院必须安排另一位教学人员来监督我的学生上课(监督老师)。我被委托寻找志愿者来执行这个责任。幸运的是,我院的四位台湾同事自愿帮忙,他们还代我招募了其他教学人员来支持他们。
  • I must provide an online delivery plan to my School for endorsement and to seek final approval from the Academic Affairs Office (教务处).
    本人必须向我院提交网上授课计划,以供教务处审核。
  • At the end of the semester, I must submit a report on each of the classes I taught online to the Academic Affairs Office via my School. 
    在学期末,我必须通过我院向教务处提交一份关于我所教的每门课的报告。
  • For practical/laboratory classes, I must find a suitably qualified colleague to run these classes on my behalf.  
    对于实践/实验课,我必须找到一个合适及合格的同事来代替我来运行这些课程。
  • For any classes with final examinations, the students must sit for the examination physically and thus I must find a colleague to grade the examination scripts on my behalf.  
    对于有期末考试的班级,学生必须参加纸质考试,因此我必须找一个同事代替我评分试卷。

I fully agreed and endorsed the Academic Affairs Office’s views on the conduct of my online classes. My students’ learning experience must not differ too much from “truly” face-to-face delivered classes. In shorts, they must not be disadvantaged on my account. 

我完全同意并赞同教务处对我的网络课程的处理要求。我的学生的学习经验不能与“真正的”面对面授课有太大的不同。换句话说,他们不能因为我的状况而处于不利地位。

With the mandate from my School and ZQU, I then set about re-adapting my lectures to ensure that I had a fair chance of fulfilling (surpassing) the basic requirements laid down for me to deliver my classes online. 

有了学院和学校的授权,我开始重新调整我的课程,以确保我有公平的机会实现(并超越)我在线授课的基本要求。

Adapting face-to-face presentation for online classes 调整面对面演示为在线课程

One major flaw of online delivery compared to face-to-face classes is the lack of a “feedback” from your students. If you cannot “see” and “hear” them, it is very hard to gauge your students’ engagement and attentiveness. The presence of my colleague as class supervisor (监督老师)would just ensure that there were discipline in the class. I would need to find ways to engage my students. If not it would be easier for them just to watch a pre-recorded video of my lectures! 

与面对面授课相比,在线授课的一个主要缺陷是缺乏来自学生的“反馈”。如果你不能“看到”和“听到”他们,你是很难衡量你的学生对你课的参与和注意力。监督老师的存在只会确保课堂上有纪律。我需要想办法吸引我学生的注意力。如果不是的话,他们就不如看一段我事先录好的讲课视频就算了!

The inventors of Rain Classroom from Tsinghua University must have heard the collective prayers of many teaching staff like yours truly. They invented an add-on to foster in-class engagement for presentation slides that can also be adapted for online delivered classes. This add-on, Rain Classroom was easily installed (on PowerPoint as well as WPS) and more importantly was very user-friendly.

清华大学“雨课堂”的发明者们一定听到了许多像我一样的老师们的集体诉求。他们发明了一个插件,教师可以通过该插件促进学生在课堂的参与和互动,该插件也可以适应在线授课。雨课堂是很容易安装(PowerPoint以及WPS),更重要的是非常用户友好。

Leaderboard of Rain Classroom
At the end of each class, the leaderboard would be posted in the group chat showing the top 3 scorers of the in-class quiz along with a link to the lecture slides. 在每节课结束时,我会将领导板贴在小组聊天中,显示课堂测验的前3名得分者,以及与讲课幻灯片的链接

I therefore set out to add at least four but mostly 5 – 6 in-class quiz questions in every lecture. I made all these quiz questions carry marks towards the “class participation and usual grade” (班上互动和平时成绩)segment of the final result. To excite the students a bit more I even, for some of my classes, put up “hong bao – 红包” – a small red-packet of e-money for the top scorers for every session. Rain Classroom would generate these data at the end of each class with a chart showing who were the top three scorers of a session. I would post this data to our DingTalk chat group at the end of each lecture.

因此,我开始在每堂课中添加至少4题,但大部分是5-6题课堂测试问题。我把这些小测验的问题得分纳入最后成绩的“班上互动和平时成绩“部分中。为了让学生们更兴奋一点,我甚至在我的一些班级里,贴上了“小红包”–雨课堂的电子货币,奖励每一节课得分最高的头三位同学。“雨课堂”将在每节课结束时生成这些数据,并给出一张图表,显示谁是一节课的前三名得分者。每次上课结束后,我会把这些数据发到我们的钉钉聊天群。

This “leaderboard” gave an element of competition and thus help to gamify my lectures a little. The most important thing was, with these set up, I ensured some sort of engagement from my students. In addition, these in-class quiz question and the scoring also helped in making sure students were learning progressively and we were not relying on one final examination to verify the learning attained by students (a practice that I, as an educator would try to avoid if possible). Rain Classroom also has a very effective way to log in students’ activity. Hence I would require all students to log into system using a link that I would provide at the start of each class. If you are not signed in, you will be considered as “absent”. Of course in a few odd cases (students forgot to bring their mobile phone to class; mobile phone missing / damaged) I would take note of the class leader’s verification and marked this lot as “present”. However, this lot would not be able to take part in the in-class quiz (and was destined to lose the marks for these too).

这个“领队板”给出了竞争的元素,从而使我的讲课有点游戏化。最重要的是,有了这些设置,我确保了学生们的某种程度的参与。此外,这些课堂测验问题和分数也有助于确保学生逐步学习,我们没有依靠一次性的期末考试来验证学生所取得的学习成绩(如果可能的话,作为一名教育家,我会尽量避免这种做法)。雨课堂也有一个非常有效的方式来记录学生的课堂活动。因此,我会要求所有的学生在每节课开始前使用我提供的链接登录到雨课堂系统。如果学生没有在雨课堂签到,他将被视为“缺席”。当然,在一些奇怪的情况下(如学生忘了带手机来上课;手机丢失/损坏等等),我会在考虑了班长的核实后,将这批人标记为“在场”。然而,这批人将无法参与课堂测验(而且注定也会因此失去分数)。

The “randomness” in the appearance of the in-class quiz questions also served one good purpose: students would have to pay attention as they would not be forewarned when my question would spring up. As the duration for answering these questions was 2 -3 minutes on average, looking up the answers on the internet would not be facilitated. With these in-class quizzes I achieved one thing that mattered most – keeping students on their toes, well most of the times!

课堂测验问题出现的时间及其“随机性”也有一个好的目的:当我的问题出现时,学生们将不得不注意,因为他们不会得到预先警告。由于回答这些问题的时间平均为2-3分钟,是不利于在互联网上查找答案的。通过这些课堂上的测验,我实现了一件最重要的事情–让学生保持警觉,这情况可能在大多数时候是可以实现!

So within a couple of lessons all my students taking my classes online learned the drill 所以在几节课之内,所有上我网课的学生都学会了以下几点 : –>

  • Charge up your mobile before class; 上课前给手机充好电;
  • Make sure you have your mobile phone with you when attending my class; 上课的时候一定要带着手机;
  • Log into Rain Classroom before the start of each class; 在每节课开始前登录雨课堂;
  • Pay attention as the in-class quiz question could come out at any moment! 上课时必须注意,课堂提问随时都有可能出现!

Although we only needed the class leader to log into DingTalk on the classroom PC to ensure that my live broadcast was projected to the large screen for everyone’s viewing, other students could also log into DingTalk during class to communicate with me (and the rest of the people who had signed in) . 

虽然我们只需要班长在教室的电脑上登录钉钉以确保我的直播被投影到课室的大屏幕上供每位学生观看,但其他学生也可以在课堂上登录钉钉与我(以及其他已经登录的同学)交流。

One of the best features of DingTalk is its ability to record and archive all online classes (if one chooses to do so). I would not mind letting my students re-watch the recorded broadcast as some of the points I raised might need a student to look at it a few times to grasp. The recorded classes would also ensure that students who took leave had a chance to learn what they missed out (of course they would not score marks on the in-class quiz). So at the end of each lecture, I would publish my recorded lecture and post the relevant link to the class’s DingTalk group.

钉钉最好的功能之一是它能够记录和存档所有在线课程(如果该功能被启动了)。我不介意让我的学生再看一遍录制的直播作因为我提出的一些观点可能需要学生多看几遍才能掌握。录制课程也将确保请假的学生有机会学习他们错过的内容(当然,他们不会在课堂测验中得分)。所以在每节课结束的时候,我都会发布录制的直播供学生观看回播,并把相关链接发到班级的钉钉里。

Unlike some of my fellow educators, I have no issue for my students having a copy of my PowerPoint presentation used in class. Rain Classroom has a function that I could “enable” to ensure that my students could review the lecture presentation slides. This feature coupled with the recorded class lecture would help student in their revision immensely (how I wish I had these during my student days!). These same features also enabled students who were unable to attend my class, to view the re-play along with the presentation slides so as to catch up with the course. 

与一些其他教育家不同,我认为让的学生使用我课上PowerPoint演示文稿是没问题的。雨课堂就有这一个功能,我可以“打开”该功能,以确保我的学生可以演示幻灯片来复习。这一功能,再加上录制的课堂讲座,将极大地帮助学生复习(我多么希望在我的学生时代有这些!) 。相同的功能也使那些无法上我课的学生能够随同演示幻灯片一起观看重播,以赶上课程的进度。

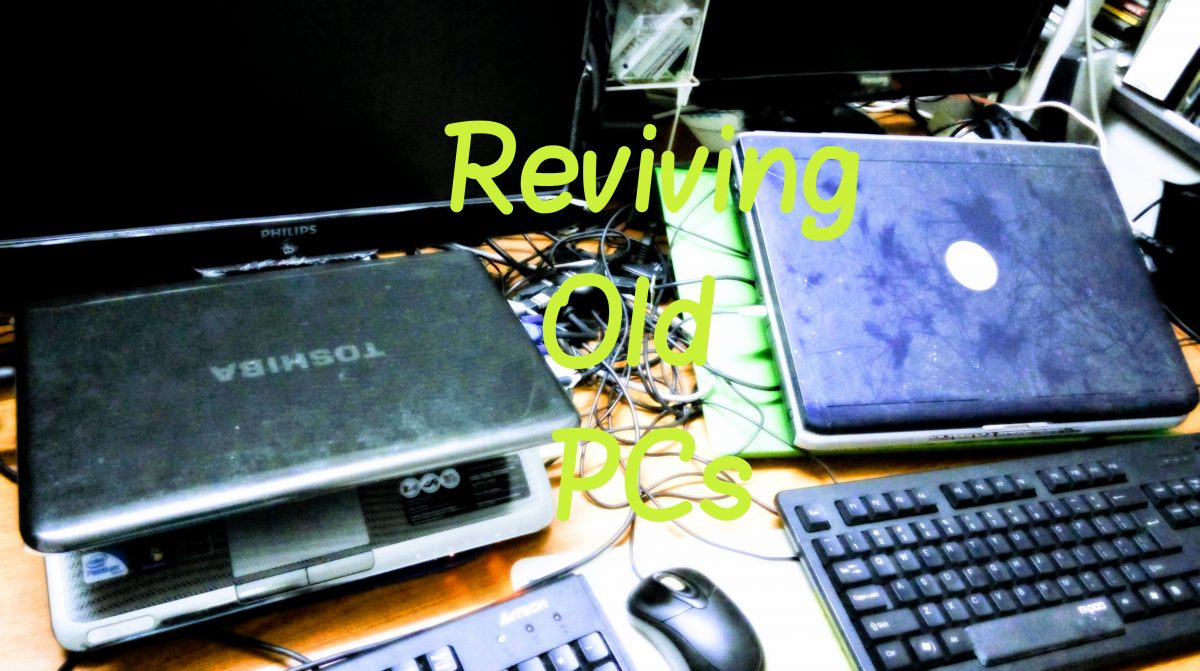
Tools and Gears for online delivery of classes 在线授课的工具和设备

I knew back in May 2020 that the most important gear that I had to procure was a semi-professional microphone. The interferences picked up by the cheap old mic were just too much to bear. But at the height of the Movement Control Order in Malaysia (where there was almost a blanket restriction on movement of people nationwide for weeks), getting geared up even with online purchasing was a bit challenging. But I did mange to get a reasonably good microphone that has done a good job in filtering out background noises. 

早在2020年5月,我就知道我要买的最重要的设备是一个半专业性的麦克风。廉价的旧麦克风所带来的干扰实在太大了。但当时马来西亚是处于“行动管制令 – Movement Control Order” (几周来几乎对全国范围内的人员流动实行了全面性的限制),即便是在网上购物,也是相当困难的。但在“行动管制令”放宽后我确实得到了一个相当好的麦克风,它在滤除背景噪音方面做得很好。

The camera that came with the laptop was another issue. It was not versatile enough to give a good view of me for my lectures. Luckily my son’s ‘hand-me-down” Logitech webcam came in handy.

笔记本电脑附带的照相机是另一个问题。它不够多功能,不能为我的演示提供一个好的视频。幸运的是,我儿子有个旧的“传”给我,这罗技网络摄像头派上了用场。

As I had to “see” and ‘hear” what my students were seeing and hearing at their classroom in China, I knew that I would have to set up another DingTalk account on my old laptop. I would run DingTalk simultaneously but to avoid the “echo and feedback” effects I had to use a headphone to listen to my own live broadcast. The time lag was around 10 seconds for my live broadcast to reach my students in China. This served me fine in my monitoring of my own online classes in a “live” manner. 

因为我必须随时“看到”和“听到”我在中国的课堂上学生所看到和听到的视频,我知道我必须在我的旧笔记本电脑上设置另一个钉钉帐户。我会同时在两部电脑运行钉钉,但为了避免“回声和反馈”的影响,我不得不使用耳机来听我自己的现场直播。我的直播时间滞后了大约10秒,这刚好让我很好地监控了我的在线直播课程。

For communication with the class monitor (班长) and/or class learning committee representative (学委), I would have a direct chat line opened with one of these class leaders so that they would be able to alert me of any issues while the live broadcast was going on. Thus I would have to monitor WeChat too during class. 

为了与班长和/或学委沟通,我会与其中一位班领袖开通一条直接聊天线,以便他们在直播期间提醒我任何不常的状况。因此,我将不得不在课堂上监控微信

As all the classroom’s computer, projector and sound systems were kept in lock and key, to make life easier for my class leaders, I had, at the start of each semester, sent out an “SOS” message to all my teaching colleagues, alerting them of the locations of my classes. I sought out their help to, if they were having classes nearby, unlock these teaching gears for my class leader(s) for them to set up the PC, projector and sound systems before the start of each class. The “show” would commence as soon as I receive a “all ok” signal (in this case just a “2”) from one of the students.

由于教室里所有的电脑、投影仪和音响系统都锁得严严实实,为了方便我的班长/学委,我在每个学期开始的时候都会给所有的教学同事发一个“求救”信息,让大家知道我班学生上课的课室。我恳求他们的帮助,如果他们在附近上课,在每节课开始前,为我的班长/学委打开这些教学设备,以便他们可以在开课前启动课室电脑,投影仪和音响系统。当我收到一个学生发出的“一切正常”的信号(其中一位同学会发我一个“2”信号)时,我就知道是我“开锣”的时候了!

Needless to say, not every class could proceed smoothly, technology and people had a way in messing up plans. One of my classes was late in the evening, and in one of the sessions my class monitor could not find a staff member to unlock the teaching gears (and that was the day when the “supervising staff” was not at the class early). It took my “SOS” call to my School’s academic administrative colleague to send someone to the rescue! There were also times when either the PC or the projector (or the sound system) or the internet access was not behaving properly. But credits to my different class leaders in different classes, they somehow managed to get these systems working again in good time. 

不用说,并不是每一节课都能顺利进行,技术和人们都有办法把计划搞砸。记得我有一堂课是排到傍晚,在其中一节课上,班长找不到任何教工人员打开教学装置 (恰好当天的监督老师还没到课室 – 监督老师不必全程在课室,有时会选择“突击”检查)。接到班长的通知我赶紧联络我学院的学术行政同事派人去“救援“!也有一些时候,无论是课室电脑,投影仪(或声音系统)或互联网连接都有机会不操作。我很幸运,因为我各个不同班的班长/学委们在面临困难时都设法去解决问题,使得我大部分的网课都顺利进行。

So in every live broadcast lecture I would be: 所以在每一次直播讲座中,我都会:

  • Hooking up the PowerPoint software with Rain Classroom to ensure that the class interaction will be presented and students’ responses were captured (and graded).
    将PowerPoint软件与雨课堂连接,以确保课堂上的互动将被呈现,学生的反应将被捕获(并进行评分)。
  • Looking at my PowerPoint presentation, which was often set to “presenter mode”. 
     在另一个视频看我的PowerPoint演示文稿,它经常被设置为“演示者模式”。
  • Ensuring that the PowerPoint presentation screen was captured by DingTalk so that it could be projected in my classroom in China.
    确保PowerPoint演示的屏幕被钉钉捕获,这样它就可以在中国我学生所在的课堂上投影。
  • Checking and ensuring that my sound and video streams were reaching my classroom in China on my “old” laptop. 
    在我的“旧”笔记本电脑上检查并确保我的声音和视频流能到达我在中国的课室 【监控我学生所看到-听到的视频】。
  • Communicating via WeChat on my mobile phone with my class leader, he/she would use this channel to alert me privately of any issues during class.
    在我的手机上通过微信与我的班长/学委沟通,要是有需要,他/她会用这个渠道私下提醒我在课堂上的任何问题。
  • Looking at the Rain Classroom screen to monitor the signing in of my students to ensure everyone who was supposed to attend had signed in (because if they were not signed in to Rain Classroom, they could not participate in any of the in-class quiz questions, and so would score no marks for this class!)
    查看雨课堂的屏幕来监控我的学生的签到情况,以确保每位应该参与的同学都签到了(因为如果他们没有登录雨课堂,他们就不能参与任何课堂测试问题,所以得不到这堂课测试的分!)
  • Periodically checking DingTalk’s group messaging section to monitor messages sent to me in-class by my students (and to respond accordingly). 
    不时检查班钉钉群群聊部分,以监控我的学生在课堂上发送给我的信息(并相应地回应)。
Dingtalk-mobile view of online class
Mobile Phone view of my online class: I had to constantly monitor the interaction section in order to respond to students’ in-class communication.手机上检查我的在线课堂:为了回应学生的课堂交流,我不得不不断地以手机监控钉钉互动部分。

So there you are, I had to monitor at least six different screens for sound and video! Most were things that a person delivering face-to-face lectures would not have to worry about! All these constant (and at times simultaneous) monitoring and keeping alert were very taxing on my energy to say the least.

由此可知,我不得不监视至少六个不同的屏幕的声音和视频!在大多数的情况,一位面对面教学的老师是不必担心以上的!所有这些持续的(有时是同时的)监控和保持警觉,是吸取我不少的精力。

On top of that, I had to be aware of my own internet connection and bandwidth (and power supply) which to the credit of these utility suppliers in Malaysia, I did not face any cut in services during any of my classes over the 30 months period. I did had a couple of incidences when my “better half” accidentally dropped a metal mug cover and the lid to a cooking pot very near the closed door of the room where I had my live broadcast. My students nevertheless did not complain, a consolation perhaps?

最重要的是,我必须意识到我自己的互联网连接,带宽和电源供应。归功于马来西亚的相关的设施供应单位,在我的30个月的课程中,我没有面临任何服务削减。可是我确实发生了几次意外: 有次我的“另一半”不小心把一个金属杯子盖在我”书房“门外掉下,另一次她将煮锅盖子在同一地方掉下!我没有接到的学生们的投诉,也许是一种安慰?

Even before the online teaching stint, I had already put almost all of my assignments and coursework on the “online submission” mode. This was because I had a fall while pushing my electric bicycle up a ramp on campus on April 25, 2019, this had resulted in a broken right wrist and I could not even hold up a single piece of paper for days.

其实在开始在线教学之前,我就已经把我几乎所有的课程作业都放在了“在线提交”模式下。这是因为2019年4月25日,我在校园里推电动车上坡时摔了一跤,导致右手腕骨折,几天来连一张纸都拿不起来。

Broken wrist
April 25, 2019 was a bleak day, Dr. Chow YN broke his right wrist in a fall. That prompted him to think of ways to minimize handling of physical papers – so online assignment submission was adopted! 2019年4月25日是一个倒霉的日子,周永能博士在一次摔倒中摔断了右手腕。这促使他想办法尽量减少对实物论文的处理——所以采用了在线作业提交!

At that time my application of online submission initially was a bit crude (students emailed their lab reports shot on mobile cameras to me for grading). But I soon learned, to my great advantage later on, to use wen-juan-wang问卷网 (an online survey platform that could handle marking/collecting/compilation of data/upload of documents etc.) coupled with QQ documents to lay out readings and other assignment content/questions to run my online assessment system rather efficiently and effectively. 

当时,我最初的在线提交方式有点粗糙(学生们通过电子邮件将手机摄像头拍摄的实验室报告发送给我进行评分)。但我很快就学会了使用问卷网,这对我后来网课很有帮助。问卷网是可处理标记/收集/汇编数据/上传文件等工作的在线调查平台。再加上QQ文档来布置阅读和其他作业内容/问题,使得我可以有效地运行我的在线评估系统。

Assignment link
QQ docs sharing feature was often used to share assignment content/reading. In this case, after reading the content, students were to proceed to Wen-Juan-Wang to answer the assignment questions. A link was provided for checking the submission status too. QQ文档共享功能经常用于共享作业内容/阅读。在这种情况下,在阅读完内容后,学生将继续到问卷网回答指定的问题。我还提供了一个链接,让学生用于检查提交状态。

Students could attempt quizzes online that would often be graded by the system immediately so that they could re-attempt (I usually set a maximum of 3 attempts) to improve their grades. For some assignments, students would upload their papers onto the platform where I would download these papers, grade them (with comments) and return these papers to students (via a selection of online storage platforms in China such as Tencent Drive, Baidu Cloud, Aliyun Drive) with my feedback, comments and manual grading. For group assignments, I would just post the graded papers on DingTalk chat group for students to download.

学生们可以尝试在线测验,这些测验通常会由系统评分这样他们就可以重新提交(我一般设定最多3次提交机会)来提高自己的成绩。对于一些作业,学生们会把论文上传到这些平台上,以便我评分(包括评论和反馈),然后我将这些论文返还给学生(通过在中国的在线存储平台,如腾讯微云,百度云盘,阿里云盘)。对于小组作业,我会直接把评分后的文档发到班钉钉聊天群里,供同学们下载。

The beauty of online submission /online quizzes is that there would be a paper trail. The lecturer could easily assign deadlines and for quizzes the number of attempts as well as the duration of each attempt could be customized. I even set up a link for students to make use of Wen-Juan-Wang’s feature of letting students check the status of their own submissions (thereby nullify the work needed on my part to respond to such requests!).

在线提交/在线测验的美妙之处在于会有书面记录。老师可以很容易地分配提交期限和测验的次数,以及每次尝试的持续时间也可以被定制。我甚至为学生建立了一个链接,让他们使用问卷网的功能来检查他们自己提交的状态(从而摆脱了我需要响应这些请求的工作!)

With the online submission framework, I was able to monitor the status of submission as the deadline came closer to remind and “chase” those who were still lagging behind. Putting this status up in DingTalk chat group had one great advantage: I could use peer pressure to “force” the “usual suspects” (yes, in each class there would be at least one such individual) to comply. As almost everything of this framework was “transparent”, I minimized the chances of students giving lame excuses for their not submitting their work on time. Unlike hardcopies of assignment papers, I always had a copy of each students graded work. This made reviewing of students’ performance for the end-of-semester final grading a lot more efficient.

有了在线提交框架,我能够在截止日期临近时监控提交状态,以提醒和“追赶”那些仍然落后的人。把这个状态放到钉钉聊天群里有一个很大的好处:我可以利用同学们的压力来“促使”这些“惯犯”遵守规则(是的,在每个班将至少有一个这样的个”惯犯“)!由于这个框架几乎所有的程序都是“透明的”,我尽量减少了学生不按时提交作业的蹩脚借口的机会。不像纸质的作业,我总是有每一个已经评分的学生提交的作业副本。这使得对学生期末成绩的回顾变得更有效率。

The video above was captured by my kind colleague, Associate Professor Xing Zhi-Hang (郉志航副教授)when he was supervising my “Professional English” class. Apart from the fact that my physical self was not at the podium, everything else “looked” and “sounded” not much different from a truly Face-to-Face class. Personally I only realized this fact after Dr. Xing sent me this clip. I knew then at least in this aspect, my students were not disadvantaged much!

以上视频由我的同事邢志航副教授在他监督我的“专业英语”课时所录制的。除了我的个体没有出现在讲台上,其他的一切“看起来”和“听起来”都和真正的面对面课堂没有太大的分别。我本人是在邢教授发给我这段视频后才意识到这一点的。我那时就知道至少在这方面,我的学生并没有遭受任何不利影响!

[在国内的朋友可以从百度网盘提取以上的片段:链接:https://pan.baidu.com/s/1EwJgzkf6vTnyNI4fe4JVeg 提取码:hlal】

In the 2021 spring semester (Mar – Jul 2021) I was assigned to teach “Biostatistics 生物统计学” along with Professor Su Jun-Kui (苏俊魁教授)who taught his class in the Face-to-Face mode. As the subject had a compulsory final examination element and the two classes were to take the same paper, it gave a very good opportunity for me to compare if the teaching-learning processes of the online class differed much from the Face-to-Face version. In our case, the composition of students of the two classes were very similar. They signed up based on the time table slots available (as such the academic background of the students for both classes were very similar and “semi-randomly” assigned). In late July 2021 I was very happy to learn from Professor Su that the final results of both his and my students were very similar (my students’ examination scripts were graded by Associate Professor Hung Shuo-Ting 洪硕廷副教授 ) . This showed that my students, despite having me as a lecturer (I was not that good in biostatistics and had to rely on and learn a lot from Professor Su during the course of my delivery,to whom I am greatly indebted) who delivered my classes online, did not appear to be disadvantaged at all!

2021年春季学期(2021年3月至2021年7月)我被排到教“生物统计学”这门课。当时另一班学生是由苏俊魁教授以面对面授课方式授课的。由于这门课有一个强制性的期末考试,而且两个班要考同样的试卷,这给了我一个很好的机会来比较在线课程的教学过程是否与面对面课程有很大的不同。在我们的例子中,两个班的学生组成非常相似。他们根据时间表上的空档报名(两个班的学生的学术背景非常相似,进入哪个”生物统计学”班是“半随机”分配的)。2021年7月下旬,我很高兴地从苏教授那里得知,他的学生和我的学生的最终成绩非常相似。(我学生的试卷由洪硕庭副教授批改 ) . 这表明,我的学生虽然说是上网课,但他们并没有表现出一点劣势!(“生物统计学”这门课并不是我的强项,在我讲课的过程中不得不依靠苏教授指导,并从他那里学到了很多东西,非常感谢!)

I did a quick compilation of data about my three and a half year of serving as an Associate Professor at ZQU 我做了一个关于我在肇庆学院担任副教授三年半数据的快速汇编:

  • The number of different classes taught = 24 [6 were Face-to-Face; 18 were online
    所教的不同班级的数量=24班 【6班是面对面;18班是在线]
  • The total number of students taught = 1066 [of these 786 were different individuals]
    所教学生总数=1066人【其中786人是不同的个体】
  • The number of students taught online = 813 [of these 556 were different individuals
    在线教学的学生人数=813【其中556人是不同的个体]
Teaching evaluation Jul2022
“The proof the pudding is in the eating”. Feedback from students in Jul 2022 largely showed that most didn’t feel disadvantaged by taking my online classes. 有句英语术语:“布丁的好坏在于吃的过程”。2022年7月学生的反馈主要表明,大多数学生认为他们并没有因为上了我的在线课程而感到处于劣势。

The teaching evaluation exercises towards the end of each semester was taken very seriously at ZQU. While I was never the “top teacher”, nevertheless I was never in “danger” of being the lowest scorer. If you could read Chinese, you would notice that the bulk of my students in the July 2022 session who responded were giving my online teaching positive reviews. That was the most satisfying outcome for an academic, I could not have asked for more! I guess those students who like to learn would have found my online classes beneficial while those on the “muddle along” (得过且过)mode would have been very intimidated by my online delivery style. 

每学期末的教学评估活动在肇庆学院是非常被重视的。虽然我从来不是“最好的老师”,但我从来没有处于“危险区”–成为最低的得分老师。从以上的图,你会注意到,在2022年7月的评教上,我的大部分学生都对我的在线教学给予了积极的评估。这是一个教学者最满意的结果,我不能要求更多!我想那些喜欢学习的学生会发现我的在线课程是有益的,而那些“得过且过”的学生则会被我的网上授课方式所吓倒。

In Part 2, “Remote supervision of students’ thesis work – a tall order” I will share my experience in remotely supervising students on their graduation thesis. Stay tuned! 
在第二部分,“远程监控学生的论文工作-一个很高的要求”,我将分享我的远程指导学生的毕业论文的经验。请继续关注!

My tulmutous experience with WeChat Wallet

This article shares the author’s tortuous path towards getting WeChat Pay sorted during his trip from Malaysia to China when he left his entire wallet at home, with only RM15 to his name!

[show_post_categories show=”category” hyperlink=”yes”]

[show_post_categories show=”tag” hyperlink=”yes”]

At the start of my recent business trip to Guangzhou, China, I discovered that I committed the grievous of all errors that a seasoned (overly organized by my wife’s definition) traveller would not have done –  I left my wallet with all my cash, debit and credit cards at home! The only money I had was fifteen Ringgit Malaysia (RM15) that I kept in the casing of my mobile phone just in case I needed small amount of cash should I forget to bring my wallet when I was outside the house.

The start of the panic!

I was able to sail through immigration etc. because I had my passport with me and this was the only document (aside from the boarding pass) that I needed. Worse, I only discovered my predicament AFTER this process. By then, my wife who dropped me off in her car had arrived home from KL International Airport (KLIA). Even if she could fetch me the wallet, there would be a lot of persuading on my part to be allowed by the authorities to get through all those layers of security to meet my wife. And the clock was ticking, there was no certainty that my wife would be able to get to the airport with my wallet in time. Panic began to set in!

Transferring fund into WeChat Wallet

Then I remembered a friend from China telling me that he was able to live cashless relying only on his WeChat wallet for a week. I immediately contacted my wife to snap photographs of all my credit and debit cards and Whatsapp-ed these to me. This would allow me to “charge” up my WeChat wallet with some cash that I could use. Well that was the salvage plan.

As I already had my WeChat wallet set up and my identity verified (via a elaborate process involving snapping photographs of my MyKad and credit card), I thought adding a debit card where I could draw some cash would be a breeze. However, the debit card was only useful to you in this case if you have had authorized it to carry out  internet transactions which I did not do for my MayBank debit card nor was I had any luck with my Affin Bank card. But luckily, my Public Bank debit card did have this feature switched on and I was able to upload RM500 to my WeChat Wallet. But when I tried this wallet on, all the duty-free shops (that accepted WeChat Wallet) could not transact the payment. One of the shop assistants kindly suggested that this could be due to their system being set only to accept WeChat wallet of China visitors. Thus there might still be hope for me to be able to use my WeChat wallet in China!

AliPay is of no use

I did not give up. Next, I installed AliPay app and managed to add one of my credit cards to the system. But I faced the difficulty of verifying my identity. I was instructed by the app to upload a photograph of my passport to let AliPay’s people verify my identity. But this would take a few days (today, six weeks later, I am still waiting for an update from AliPay!). Thus AliPay was not a solution for me.
[Later, I Googled and found out that AliPay can only verify a bank card if it is issued by a bank in China!]

You need your physical credit card to access the airport lounge

I was hungry and remembered that one of my credit cards allowed me two free use of the airport lounge per month. So off I went in search of this lounge.

“Sorry sir, we do need the physical card to swipe and charge even if we can proof your identity with your passport”, was the reply I received when I presented my Whatsapp-ed copy of the credit card. Needless to say, my plan to use the lounge to get some food was in tatters. With my meager cash of RM15, I therefore could not take a chance to buy breakfast! I was looking forward to a proper meal on the plane! Hungry!

Free WiFi at Guangzhou Baiyun airport saved the day

To cut a long story short, I did not have to rely on my Wechat wallet for this trip. Guangzhou Baiyun airport provides free WiFi (you need to register to use). With this free WiFi, I did not have to switch on my mobile data roaming that would have cost me RM38 the instant I enabled it!

In this case I could use my WeChat identity to log on to Baiyun Airport’s WiFi. I was able to WeChat message the organizer of this business trip, Dr. Yan who happened to be at the airport early to meet the rest of our group. A loan of five hundred Renminbi (RMB 500) cash was promptly provided by Dr. Yan. This solved my cash problem as all transport and accommodation for the trip were arranged and sponsored by our host.

[I must add that, prior to that day, both Dr. Yan and I only communicated via WeChat. We’ve never met! I also was supposed to make my own way to the host university from Baiyun Airport about 100 km away, thus I would need to have at least RMB100 cash. There was no certainty that my Didi app which was linked to my credit card would work. It might not be a travel option. I did have the flight number of the rest of my group travelling from Taipei. If I did not meet Dr. Yan, and my WeChat Wallet did not work, my last resort would have been to camp outside the arrival gate with a placard to find them. Again, I had never met any of my group members before! It turned out that my luck was a bit better. Not only I could find Dr. Yan, he allowed me to hitch a ride to the host on a bus he arranged for the members from Taiwan.] 

Make sure you have a credit card verified travel booking app

As I had to stay an extra night in Guangzhou compared to my other group members, I promptly searched for a night’s accommodation on Trip (an app I used to book the flights for this trip). As Trip has already had my credit card details (and verified these when I booked my flights), I had no problem getting my room at a small apartment-hotel near the Baiyun airport.
[Travel tip: always have at least one of your favourite travel booking apps on your mobile phone and make sure it has all your credit card details. You never know when you will need it as in my case!]

Guangzhou’s Metro accepts WeChat pay too, but must have internet to work

To satisfy my curiosity, when I made my way to my hotel, I tried to use WeChat wallet on the Guangzhou Metro. A very nice young lady staff tried her best to help me to WeChat pay my fare. Then we discovered that Baiyun airport’s WiFi signal was too weak at the Metro station. I was not going to pay RM38 data roaming charge to carry this experiment to fruition. I went on to pay for the RMB2 fare by cash. I did have to go to another counter to have my RMB100 changed to smaller denominations that the ticket machine could accept.
[Travel tip: always carry some smaller denomination Renminbi, say in RMB10 at least for public transport etc.]

How to set up WeChat Wallet for China

WeChat Wallet comes in different versions. This, I found out when I was enlisted by my old pal, SM Liew who was experimenting with WeChat’s Red Packet feature. Red Packet allows WeChat users in China to send small “hong bao” (red packet) to their friends on WeChat anywhere in the world. To get your China version of WeChat Wallet enabled, all you need is a small Red Packet from someone with a WeChat Wallet for China. The moment you accept and open the Red Packet, your China wallet is enabled!

I repeated the same procedure successfully with my son recently by sending him a RMB0.50 Red Packet, from the RMB1.00 I received from SM Liew! Of course, my son had to get his identity verified and his WeChat wallet linked to one of his debit cards first.

WeChat Wallet Malaysia version does not like rooted phones!

With RM500 inside my WeChat Wallet and having failed to use this at KLIA duty-free shops which accepted WeChat wallet, I wanted to see if I could withdraw my money to my bank account. The moment I click “Withdraw”, I was hit with this message. “Withdrawal is not supported on jail-broken or rooted mobile phone.

Rooted phone not allowed!

A call to WeChat Malaysia’s call centre was made (on Oct 09, 2018) but I was told to screen capture the message and use the feedback system to complain to WeChat. I was promised a two-business days response, that was four days ago (this article was written on Oct 13, 2018)! I have not heard back from WeChat Malaysia since.

Feedback to WeChat, 2-business days turnaround is not true!

With this information, I can speculate that my rooted smartphone was the cause of my failure to make a payment with WeChat wallet at KLIA’s duty-free shops. So, is my RM500 stuck at my Wechat Wallet forever?

[3 hours after I published this article, WeChat Malaysia finally responded to my feedback, citing Bank Negara (Malaysia’s Central Bank) rule that rooted mobile phone cannot be used for fintech transaction as the reason. Perhaps someone from WeChat Malaysia DID read this article?]

[With the latest update (version: V6.7.3), WeChat Wallet Malaysia seemed to have “re-allowed” rooted phones to work. I was able to initiate a withdrawal from my WeChat Malaysia wallet. If the transaction can be completed, I will update it here  Two working days were all it took for the transaction to withdraw RM400 from my WeChat Malaysia wallet to my bank account to be completed.]

WeChat’s multiple device sign in, a get-around for rooted phones!

Unlike Whatsapp, WeChat does allow multiple mobile devices to access it. But you can only do so one at a time. This means if you access WeChat on a spare mobile phone, yoru existing WeChat app will be signed out on the main phone. I had installed WeChat on my Amazon Kindle tablet before and using “username and password” option to sign in, I was able to access my WeChat Wallet for Malaysia and the offending message above did not come out. I can now withdraw my fund from this wallet by accessing WeChat using my Kindle!

Lesson learned and shared:

  1. Don’t forget your wallet when you travel, especially to overseas destinations!
  2. In case you have left your wallet at home on your trip, you should always keep one of your credit cards in your checked-in luggage [it may be worth paying the extra RM25 tax a year for this!].
  3. Always have a passport cover. Have a small cards holding wallet or just a small Ziploc bag to house some cash and one of your credit cards or debit cards inside. Keep this Ziploc bag with your passport all the time. But remove this Ziploc bag whenever you face the immigration officer (whether at home or abroad) to avoid confusing the good official who may take this as a bribe!
  4. Don’t rely on WeChat Wallet for your China trip unless you are going to have
    a) Cash uploaded to the wallet and
    b) mobile data roaming or a local SIM card.
    You cannot make use of your WeChat wallet if you do not have access to the internet in China! And it is very difficult now to get a SIM card in China.
  5. If you want to use WeChat Wallet in China, make sure that you have your WeChat Wallet for China enabled and find a way to upload RMB into it first. Of course you must have access to the internet while you are in China.
  6. Have at least one travel booking app installed in your smartphone. Make sure this app has verified your identity and your credit card. Even if you do not have your credit card with you, this app can still be used to make your bookings (like I did with Trip).

If you need to learn more and get updated with the latest discussion on WeChat Wallet for China, do check out this thread on Tripadvisor. For Americans, there is a fintech site, Swapsy which provides free transaction for swapping US$ for RMB on WeChat Wallet platform. Swapsy only works if you have a US ID card, so it is of no use to those without a US ID.

USB ISO image writer and dabbling with Linux

Problems with UNetbootin can be solved by using USB ISO image writer like Etcher where Linux Mint 19 Tara was installed well. GParted must be used with caution.

[show_post_categories show=”category” hyperlink=”yes”]

[show_post_categories show=”tag” hyperlink=”yes”]

If you are keen to give Linux a try as an open source operating system to take over the running of older PC / laptops, you will need to have a good disk image writer. This is because all distributions of Linux come as iso image file that you would need to put to either a DVD-rom or more likely, a USB flash drive. Personally, I have given up on the quirky DVD-rom burning long time ago since I had discovered UNetbootin. UNetbootin is a small utility programme allow you to source for popular Linux distribution and burn the iso image selected (which is downloaded via this application) to CD/DVD-rom or USB flash drive.

I had Linux distribution LXLE 14.04 installed in my Toshiba T210 since 2014. As some of the browsers’ functions began to malfunction, especially those related to the playing of videos, and I could not fix the problem even after updating the browser (in this case Vivaldi) to a newest version, I learned that this was solely because my OS is long in the tooth!

The iso image flash was corrupted!

To get the image of updated OS burned into USB drives, I had been using UNetbootin for a long time. But after many attempts to flash LXLE 16.0.4 iso to my USB drives, I was about to give up.

These attempts included:

(1) Changing the USB drive from 4 Gb to 8 Gb…. still I was asked to put in a username and password (which I was assured by LXLE’s forum if this happens, you have a corrupted installation of the iso file).

(2) Downloading the same iso file from another site and flash it again (just in case I had got a corrupted file from the first site) ….. the same login screen greeted me.

(4) Using GParted to reformat the USB drive each time. This had the effect of completely cleaning the USB drive for another iso image to be put on it … this made no difference!

(5) Try flashing the iso file of Puppy Linux Xenial Pup to a USB drive….. this worked.

(6) I then tried out installing real Ubuntu (which LXLE is based) on USB drive as instructed by this page . But I did not check the physical requirements i.e. the USB Drive’s size before trying this out using UNetbootin. I used a 8 Gb USB drive. It of course did not work. LXLE needs at least 20 Gb of space to work!

All these problems were not seen when I downloaded LXLE 16.0.4 in early July 2018 & burned the iso file onto my 16 Gb USB drive. And I had been “test driving” LXLE 16.0.4 for weeks so that all my printer drivers, and other software that I used on the old version of LXLE could be made to function in the new OS. Hence the quirky behaviour of UNetbootin could be due to

the system updating done after the LXLE 16.0.4 iso flashing. The updating could have done some changes to the functioning of UNetbootin!

I suddenly remembered that I had seen a USB Image Writer program in LXLE 16.0.4! So I tried to use this to flash the LXLE 16.0.4 iso file to a 4 GB USB drive as an experiment. This worked! The same program and procedure were used to flash the iso file of Puppy Linux Xenial Pup around the same time.

Careful when using GParted

GParted is a great utility programme for one to restructure the partition table of one’s harddisk (or even USB drives). However, as I described below, users are to take great precaution when using this utility. Any mistakes are usually irreversible. If you mess up your harddisk partition, you are as good as having the entire hard disk reformatted, losing all the content and installed programmes etc.

I was very careless when using GParted when I thought I had the iso flashing problem solved and I could release the 16 Gb USB drive by deleting the partition using GParted. This I managed to do easily. But GParted threw up something that said that I had another 16 Gb drive… so I went on to delete this partition table again (so I thought).

It turned out that GParted mistook the 4 Gb LXLE 16.04 live USB containing drive a 16 GB USB drive. And the working OS allowed me to delete its own partition!. I thus ended up without a working “live” version of LXLE 16.04 after that! Panic!

Luckily I had the iso files stored somewhere else and could restart my work. Thus with GParted, if you are in doubt of what you are doing, you should hit the “Cancel” button and reexamine your steps etc.

Etcher is a good USB Image writer

I then went back to my 12-years-old Dell Inspiron and fired up Puppy Linux. I searched the internet for USB Image writer and found Etcher. I proceeded to download the correct version. Etcher’s installation was very simple. I just had to extract the Appimage file and click on it! Using Etcher on Puppy Linux, I was able to write the iso image of LXLE 16.0.4 again.

The next project was to install a most up-to-date version of Linux distribution (based on Ubuntu) on my Toshiba T210.

Installing Linux Mint 19 Tara over old LXLE 14.04

I had tried Linux Mint before and found out that it has a current version, Linux Mint 19 Tara (Xfce Edition that is suitable for older machines) which is based on the latest Ubuntu 18.04 LTS. I downloaded Mint 19’s iso file and burned it using Etcher to another 4 Gb USB drive. I test-driven this and checked off all my requirements e.g HPLIP set up (and working with my old HP MFP 1132 printer/scanner), veracrypt installation etc. Then I went on to replace my old LXLE 14.04 (hard disk partition SDA8!) with Linux Mint 19 Tara!

So far I am happy with what I have.

As the old Toshiba T210 came with Windows 7 which was only a 32 bits version as opposed to the hardware which can take 64 bits, I actually put in the 64 bits version of Linux Mint 19. Tested the “live USB” before installation.

With 64 bits, I feel that the old Tosh now has some added computer power. But it could be a brand new OS that has not been burdened with some older operational files. I can now make full use of the 4 Gb memory that I had installed in this old Toshiba T210!

Setting up cheap web-based Xiaomi & Yi home security cams

The learning experience on installing & configuring cheap Xiaomi & Yi Technology home security webcam is shared in this article. If your are adventurous & on a tight budget, the cheaper made-for-China versions of these gadgets are for you, otherwise you should stick to the “international” version.

[show_post_categories show=”category” hyperlink=”yes”]

[show_post_categories show=”tag” hyperlink=”yes”]


With the penetration of broadband internet services in Malaysia, more and more household, especially those in the urban and suburban areas now have a reasonable stable internet connection. In early 2015 when I had to relocate alone to work and stay in Penang the thought of “keeping tab” the security of my house (450 km away) came to mind.

Having a security cam “keeping an eye” on the front of your house has a lot of benefits, but I did not figure out how this could be one of the benefits: capturing wildlife visiting my suburban neighbourhood!


In this article, I share my learning experience with Xiaomi Yi home security camera (and that of a similar one from Yi Technology). This type of home security cams will capture video (& most have “night vision” aka infrared camera). Of more importance, the Xiaomi & Yi cams that I bought are setup and linked to my smartphone. This allows me to use my smartphone to access the video captured or “live feed” from these webcams that are linked to the internet via the home-based WiFi.  

After fully tested my first Xiaomi security webcam for a few months, I went on to purchase 6 more sets for the university college that I managed. The new found “eyes” allowed my staff and I monitor key locations of the campus and hostel more effectively. These gadgets also put the security personnel on higher alert.

Requirements for home security webcams

The followings are the requirements of a workable home security system based on Xiaomi or Yi security webcams:

  1. A stable WiFi network at the premises with a reasonably strong signal at the security webcam’s location.
    If your WiFi signal is weak at the desired location, you will have difficulties connecting with the security webcam which I think must be able to connect to the server of Xiaomi /Yi to relay the footages (either live or from the memory card).
  2. Power supply / power socket to power the security webcam.
    The cable provided is about 2 metres long, you do need to have a constant AC power supply although the cam is perfectly capable of drawing its power from a mobile phone power bank. If the location of the power supply must be weatherproof, so is the location for the webcam!
  3. A suitable spot to fix the security webcam that will capture any activities in the desired areas at the premises.
    The webcam will have a camera angle of at least 110 degree wide, but it is important to site the webcam at appropriate height to capture activities in the desired area. If there is a light source nearby, it will affect the webcam infrared sensor at night, thus this must also be considered. I had to turn off the “night vision” of one of my security webcams because of the interference from “lighting noise” from cars etc.

    Security cam's strategically located
    A strategic spot to locate the security cam is crucial.   

    If the webcam is located close to a lighting source, you can adjust the night vision accordingly.
  4. A smartphones installed with the appropriate app from Xiaomi or Yi Technology
    This app is the “heart” of you entire security webcam system which you need to set up, access and control the security webcam. The same smartphone app can control more than one security webcam, provided these are of the same brand. That is, Yi Home app will not be able to control Xiaomi webcam and vice versa.

    The Mi Home app looks different from Yi Home but their functionalities are very similar.

    Yi Home app is a lot more user friendly compared to Mi Home.
  5. A mini-SD card (at least 4 Gb, preferably 16 Gb) to store captured footages.
    Although not crucial, it is best to have Class 10 SD cards that are fast enough for the camera.
  6. At least one home security webcam!
    You will need to decide on budget versus ease of use in your choice of “international” or the much cheaper “China version”. (Please refer to the section below on how to choose)

China version & international version: what are the differences?

Like many consumer gadgets, the Xiaomi brand has a lot of made-for-China only versions of the security webcams that one can get from online platforms such as Lazada. While in most cases the technical specifications are more or less the same between the China and international versions, often the interface and the firmware of China version are “locked” to China only. As there is a big difference in pricing of these gadgets, often with the China version being up to half the price of the international version, many traders offer seemingly a good bargain online.

I had purchased both the China version and international version of Xiaomi Home Security Webcams. As I understand Mandarin and read Chinese, I was able to install the app and configure the China version of the webcam, but not without some difficulties (please read on for further details on this).

The Xiaomi smartphone app (Mi Home) can smartly detect where the security webcam is located and hence if you have a made-for-China-market-only version, you will not be able to configure it to use your home WiFi. Since these security webcams need to contact (and register) with Xiaomi’s server in order to relay the video & live feed to your smartphone, if you cannot configure it, you are not going to be able to use these China version webcam.

What’s the difference between Xiaomi and Yi Technology’s security webcams?

The scene is further complicated by the fact that there are both Xiaomi and Yi Technology’s security webcams in the market that look exactly the same (and yet they are different!). A search on the Internet revealed that Xiaomi and Yi Technology are related.  Xiaomi invests in many tech companies and Yi Technology is one of these. Xiaomi often lends its brand to these new tech companies to better market their products.

Personally, I find Yi Home (the smartphone app from Yi Technology) a lot friendlier to use and I had no problem in configuring my Yi security webcam using this app on my Xiaomi Redmi Note 3 smartphone. This is a far cry from the struggle I had with Xiaomi’s “China version” security webcam.  But both apps have very similar functionalities, one of which is to allow the sharing of access to the webcams installed by one smartphone with other smartphone users. Thus if everyone in your family has a smartphone, in theory you can share the access to these security webcams to each of them.

Problems of sharing access with iOS version of mobile apps

While the Android version of the mobile apps (for both Xiaomi and Yi Technology) work perfectly well with their respective security webcams, I experienced a lot of problems with the iOS version (for my wife’s iPhone). In fact this sasme problem was also experienced by my former staff who also used an iPhone. However my wife’s iPhone 6 could easily accept my invitation to connect to the Yi Technology webcam using Yi Home for iOS so that she could view the feed from the webcam I shared with her, we have no luck with the Xiaomi Mi Home version!

Hacking the made-for-China-only version

Before buying bulk for the institution I managed, I purposely bought a China version of Xiaomi Security Webcam so that my then Head of IT and Campus Services, KB could test out possible solutions. KB was able to download a firmware for the international version of the same model. We copied this onto the mini-SD card of my China version webcam and inserted this. After powering up the webcam, we were delighted to “convert” the made-for-China-only webcam into an international version that could work in Malaysia.

The only caveat to this hack is that the firmware is not to be updated, ever. If not, the webcam and the Xiaomi server that it will connect to will detect your region and the webcam will be rendered inoperable.  The firmware is meant for this model : Xiaomi Xiaoyi Yi Night Vision 720P HD 8MP IP Camera WiFI Home Security CCTV Webcam; it may not work with other model. There are many solutions available, one just have to use trial and error to figure out which will be the best.

So which version to buy?

If like me, you are short on budget and have an adventurous attitude (and willing to muck around the PC, smartphone and webcam), then you could consider “going cheap” and buy made-for-China-only versions that are a lot cheaper. Of course there is no guarantee that you can hack the webcam from “China version” to “international version”. But it is no rocket science. If I can do it (without programming skills), I think it is just a matter for finding the most suitable firmware.

However, personally, I will advise, for simplicity on sticking to international versions to save all the headache. There is a Mi Store selling only Xiaomi marketed products in Malaysia (I visited one in One Utama Shopping mall) which sells international version of home security webcam (a more updated version too). Although the choice of models is limited, and the price is higher than if you shop online, there are knowledgeable personnel on hand to help you. And if the webcam does not do what it promises, you can always return it!

Reviving old laptops with Puppy Linux (part 2)

In this article, the author shares his experience in creating such a bootable USB flash drive, comes complete with a working Puppy Linux distribution that is persistence. Unlike “live” bootable USB flash drive of other distribution, where once a session is over, all the updates, software installed are lost, Puppy Linux will keep all the these to make it persistence & adapt to the user’s needs.

[show_post_categories show=”category” hyperlink=”yes”]

[show_post_categories show=”tag” hyperlink=”yes”]

In the previous article, I covered the basic information relating to the preparation one needs to do in order to set up Puppy Linux on a USB flash drive that is bootable. I also gave the rationale for using Puppy Linux and shared some examples on how revived old PCs / laptops could be deployed. In this article I will share my experience in creating such a bootable USB flash drive, comes complete with a working Puppy Linux distribution.

Unlike most other Linux distributions that have the USB flash drive bootable feature, Puppy Linux has an added advantage. Puppy Linux installed on a bootable USB flash drive is in fact persistent in nature. What this mean is, unlike “live” bootable USB flash drive of, say LXLE, where once a session is over, none of the updates, software installed are kept, Puppy Linux will keep all the updates, software installations etc. I guess these are kept in the “personal file” as described in the last segment of this article. So you can keep updating Puppy Linux!

How to set up a bootable USB flash drive that can run Puppy Linux?

  1. Launch Unetbootin and select “Diskimage”. Keep the default “ISO” option.

  2. Click the “ ….” tab to the right of “ISO”. Navigate to the folder with the Xenialpup iso file (for this example it is saved in “Downloads”).

  3. Put something like “100 Mb” for the “Space” used to preserve files across reboots”, since Xenialpup is Ubuntu-based.
  4. Under “Type”, make sure “USB” is selected. Plug in your USB flash drive, & make sure it is mounted (you can see this using File Manager).

  5. If you don’t see your USB flash drive listed, go back to “Type” and reselect “USB”. It will look for the newly plugged in USB flash drive and under “Drive:” something like /dev/sdc1 will be shown.
  6. Click “OK” and the installation of a bootable USB flash drive with Xenialpup OS will run automatically.
  7. If your USB flash drive has any files on it, this message will show. Click “Yes to All” [Warning: this will wipe clean an used USB drive!]. Wait till the installation process is completed.

To run Xenialpup, reboot the laptop. Keep pressing and releasing F12 (the function key,  F12 works for both my Dell and Toshiba laptop, different brands may have different function key for this, but there is surely a function key to bring up the  boot up option screen of the computer) till the screen like the one below is show.

Use the arrow key to move to “USB Storage Device” or something like that and press Enter. That’s it!

The OS will load as shown on the screen captured above.

You will see a screen with a cute puppy when loading is done! Select Xenialpup” and hit Enter on your keyboard.

The OS will load automatically. When the loading process is completely done and the OS is successfully loaded the screen with a cute squirrel will be visible (as shown below). You are then set to rock with the old laptop / PC again!

What software are supplied with Xenialpup?

Puppy Linux is not just a distribution of Linux. It is a combination of different parts of different Linux distributions and thus comes with lots of pre-selected-installed-with-OS software. It works on the RAM of your computer and thus it can be very fast if you have 1 Gb of RAM or more.

Xenialpup comes with almost all the software and applications that  you will need. These are grouped into categories such as Desktop, System, Setup, Utility,  Filesystem, Graphic, Document, Business, Personal, Network, Internet, Multimedia and Fun. You can obtain additional software clicking the cute little puppy at the Desktop, called “quickpet”(as shown below). Expert users of Puppy Linux have been configuring additional applications and software specially optimized for Puppy Linux and shared with the community of Puppy Linux users. These are called “.pet”.

If you need to read Chinese text like I do, you will appreciate one of these “pets”, CJK_fonts-ttf.pet that you can download and just click to instal.

Likewise, you can download other software via “quickpet” such as Vivaldi browser, LibreOffice and install them with just a click (but make sure that you choose the correct version for your old laptop / PC, both of my old machines were based on 32 bits architecture and softwares for 64 bits machines will not work on them).

What you are expected to do?

Puppy Linux will automatically detect what sort of hardware that your old laptop / PC has and will do its best to optimize these for your OS to work. But two areas that you may need to do some tweaking are Internet settings and sound settings.

The first screen you will see in the Quick Setup screen is shown above. You can set up the country, timezone etc. here. You may want to enable Firewall and Time from internet too.

For Internet settings, the OS auto-detects what internet connections that you might have (such as wired connection via RJ45 cable or wireless-WiFi).  There is a choice of setup tools but the simplest is to use Barry’s Simple Network Setup.

In my case (as shown above), By selecting “Interfaces” tab and clicking on “eth0” tab (located at the bottom right of the box, with “wlan0” and “windows”),  the app will try to connect with the internet over the network cable connected to my broadband router and a “success” screen will show. Similarly you can connect to WiFi using the same way.

For audio, you may need to configure the audio card.  Go to Menu->Setup->Alsa sound Wizard.

Select the Multiple cards section (No. 3). Select a sound card and select the “Test Sound” tab below. A new window will open. You should hear sound generated on the left and right speakers follow by the bark of a puppy. If you do not hear anything, put the volume to maximum and repeat.

The only other setup you need to do is the printer.  As there are many brands, it will be best to be general here. Go to Menu->Setup->CUPS Printer Wizard and follow the instructions to add a printer. Don’t forget to hook up your printer first.
[I must say, if you have a HP MFP laser printer, you may not be able to use CUPS Printer Wizard effectively. This is the only grouse I have with Puppy Linux and it is not its fault but rather HP’s complex number of models! At the time of writing, I have still not completely installed a proper driver for my HP MFP 1132 printer & scanner.]

Don’t forget to save the personal file!

When you need to exit, unless you are just evaluating and not saving the applications and software you have installed, you should save your personal files. Here is why you are advised earlier on to use a USB flash drive that is at least 8 Gb (16 Gb and higher is even better). The “system” file will need at least 1 Gb to work well (the more the merrier) and there is another partition that is made by the OS to serve as “swap”. I think “swap” as the name suggests, serves as the swapping of memory that helps the OS to run on RAM by “renting” or swapping memory on the fly (when you switch / load different software, for example). Although the system says that you will need to have at least another 500 Mb for your personal file, this is the bare minimum. I personally prefer the personal file allocation to be as big as possible to accommodate all the software and applications that I want to install. It will also carry my personal data files. But with the increasing use of cloud storage, I hardly store documents such as this piece of writing on the laptop, preferring Google Drive instead.

Thus if you are running the entire work from the USB drive, it is wise to have as big a memory as possible. I had chosen to save my personal files on the hard disk of my laptop to speed things up (and on account that I used only a 4 Gb USB flash drive!). But putting your personal files on the USB flash drive, you are truly portable! Provided that a host’s PC or laptop allows you to access the boot option (which most would), you can bring your entire computer on a USB flash drive and work on a “borrowed” PC such as at the internet cafe or a friend’s laptop safely.

With the second or third sessions of your usage, Puppy Linux will load a lot faster as it needs not tweak the system further as all the settings are saved before. So don’t pull the USB flash drive until the laptop / PC has shut down fully!

Happy Puppy Linux-ing!

Woof woof!

Revive old laptops with Linux, Puppy Linux (parts 1)

This article contains the sharing of experience & learning on how to revive old PCs/laptops using the light weight Puppy Linux as OS to replace Windows. It gives step-by-step details on how to fit the entire OS plus applications & software into a USB flash dive of a minimum of 4 Gb, with larger capacities being more effective.

[show_post_categories show=”category” hyperlink=”yes”]

[show_post_categories show=”tag” hyperlink=”yes”]

You have that 7-year-old PC / laptop lying around gathering dust. The Windows operating system (OS) is too old but your hardware cannot cope with the latest Windows OS. Worse, the web browser is old and the old OS cannot support the new version of the browser anymore.  Thus there are security issues which are stopping you from accessing some crucial websites. You are thinking that this old laptop is as good as junk.

You have heard of Linux which is free (well most distributions are indeed so). However you are under the impression that you will be required to know a lot of programming stuff to use Linux. And you have also heard that the most popular and user-friendliest of the Linux distribution, Ubuntu is known to be getting heavy on resources. Thus Ubuntu may not work well with your old PC / laptop.

But hold on. Don’t junk that old laptop yet. There is a way to get more mileage out of the old workhorse. It is called Puppy Linux. Here, I share my close to a decade of experience with Linux, especially on Puppy Linux.

That’s life still in that old piece of hardware!

I cannot do any programming, I don’t know much about HTML, less so about php or java. But you don’t need to know these to use Linux.  I had switched from Ubuntu to a light version distribution of it called LXLE in 2011. While evaluating the latest LXLE version  (based on Ubuntu 16.04 LTS aka one version behind the latest, LTS stands for Long Term Support, about 3 – 5 years)  I discovered that although the OS worked well with my 8-years-old Toshiba Portege T210, it could not be loaded on my 11-years-old Dell Inspiron 1520!

Old laptop
Toshiba Protege of 2010 vintage (left) & Dell Inspiron of 2007 vintage (right)

I used to run my old PC (bought in 2004) on one of the lightest Linux OS, Puppy Linux. Puppy extended the usefulness of the old Dell for years till the PC’s motherboard died in 2017. Hence it is a no brainer for me to try the latest Puppy Linux on the 11-years-old Dell laptop.  The latest version of Puppy Linux,  Xenialpup is also based on Ubuntu 16.04 LTS. And it could be loaded on the 11-years-old Dell!

As long as the old PC / laptop has at least 1Gb of RAM (Puppy Linux could even run on 500 Mb RAM) and could run Windows XP before, it will be able to run on Puppy Linux. For older machines, there are even versions of Puppy Linux with smaller footprint that could ran on low level of RAM, as low as 256 Mb. A list of RAM-operated Linux distributions is available at Wikipedia,  but I have only tested a few of these and found Puppy Linux to be best supported and relatively user-friendly .

How can I deploy revived old PCs / laptops?

When I commenced on operating a university college as its CEO in 2015, I faced the problem of dealing with many seemingly obsolete PCs. Most of these PCs were still in good physical working order, only the operating systems were out of date. This meant that most could not cope with the demands of resources heavy design and editing softwares. But, for simple web-browser-based usage such as searching for library information, wordprocessing, keying data etc. these old machines, if their OS could be updated via Linux could have a second bout of useful lives.

Together with my institution’s then Head of IT Services, we embarked on a small project to revive as many of these old machines by changing the OS from Windows to Linux, using the LXLE distribution which I was already very familiar with. Here are some examples of how we redeployed these revived machines:

  1. As data capturing device for marking the attendance of staff, tracking keys to rooms & tracking of tools at the workshop:
    Google Sheets can be hooked up with a barcode scanner to capture data from barbodes.

    Sources: https://pixabay.com/en/scanner-handheld-barcode-scanning-36385/; https://pixabay.com/en/bar-code-information-data-business-24157/; https://pixabay.com/en/id-john-doe-unknown-nameless-1249810/
    Barcodes on ID cards & cards attached to keys and tools are captured & recorded in Google Sheets for admin purposes.

    We sourced for barcode readers (RM180 – RM350 per item) and hooked these up with a Google Sheets. Users just have to scan their staff identity cards to have their attendance recorded. The same set up could also track keys to rooms where a user just need to scan the barcode on the card that came with the key (or tool) and then his/her  own staff/student identity card to have the record taken.

  2. For students to fill in different forms created using Google Forms:
    Almost all student admin work involving forms were converted to data capturing via Google Forms at the institution I managed.

    I moved as many of the routine administrative tasks to Google Docs / Sheets / Form as possible to cut down on paper usage and to have almost instantaneous capturing of data. Thus revived PCs were placed at strategic locations such as the Registry, the Library and the Student Recruitment office for this purpose.

  3. As terminals for accessing information at the library:
    For accessing local server’s information (of the institution’s library) and on web-based information and resources, these revived PCs, with up-to-date web browsers could be used effectively.
  4. For general usage of students in computer laboratories:
    Revived PCs were deployed for general usage by students of the university college.

    We refurbished the hardware of some of these old PCs to have higher RAM and deployed them at general computer laboratories for students to use for writing, doing email, data logging, doing desk research on the internet etc.. This allowed us to reserved the new PCs with resource heavy software (for design, programming and visual editing work) in other locations specifically for classes requiring such softwares.

The above are just some obvious examples of how redeployment of revived PCs / laptops can be implemented in an education institution’s setting. For private or business usage. The revived old PCs / laptops can, at the very least, used as a data entry terminals, extra desk research PCs and even playing presentation of videos or Powerpoint slides etc.

What you need

I shall confine this article to my experience with Puppy Linux’s Xenialpup version. But most of the steps are applicable if you choose other versions / Linux distribution.

In terms of software here are the ones that you need to download.

  1. The image (iso format) of the OS, Xenialpup. Don’t worry if you do not know what iso do. Part (b) shall cover this.
  2. Download and install a copy of Unebootin, the little application that allows you to write your OS onto a USB flash drive. There are versions for Windows, Linux and Mac. The instructions to use Unebootin will be covered in a section below.
    To install Unebootin for Windows is easy. It comes in a .exe file, so just click on this file.
    For Linux users, there is a bit more work to do:

– Note where you have downloaded Unebootin (it will be a file with a name like unetbootin-linux-661.bin). Usually this will be the folder “Downloads”
– Alt-x to bring out the Terminal.
– Type (without the quotation marks) “cd Downloads” or the exact location where you’ve the file.
– Type “chmod +x unetbootin-linux-66l.bin” or whatever name the downloaded file is called to make it executable.    (you can also do the same to change the attribute of this file in File Manager: highlight the file->Right click->Properties->Permissions->Execute (change it to “Anyone”))
– Type “./unetbootin-linux-661.bin”
– The small application will be installed.
(For making a .bin file executable & run it, I followed instructions from this site)

For hardware, you will only need a USB flash drive. While I used an old 4 Gb drive, you should use one that has at least 8 Gb capacity with 16 Gb being even better (as we shall see later why this is so). If you are using an old USB flash drive, you need to know that during the “burning” of the iso file, your existing data could be wiped out.

It is best to use a USB flash drive with as large a capacity as possible, min being 4 Gb.

In the next article, I will cover the details on how to go about creating a bootable USB flash drive containing the entire Puppy Linux OS. I will also share our experience on how best to configure the OS so that it works well with an old laptop.

What to do when your WordPress just refuses to load?

What should you do if your WordPress site just stops loading? This article shares the writer’s experience with this issue where a step-by-step solution for the problem is given. Also highlighted is the usage of Page Builder plugins & their associated supporting plugins. Never update plugins en mass is the key message.

[show_post_categories show=”category” hyperlink=”yes”]

[show_post_categories show=”tag” hyperlink=”yes”]

Just under four days ago, I found out to my horror that my website-blog running on WordPress just refused to load. This was after I did the routine updating of plugins and themes. So I Googled what one is suppose to do (and what could have gone wrong). I tried several “remedies” found on Google and am sharing my learning on this with my readers.

Don’t click the “Update” button!

Previously, as advised by many experts, I dutifully would go to the “Plugins” page to manually update each affected plugin. I was getting lazy and lately had been clicking the “Update” tab found at the top menu of my Dashboard. That was the key to all my woes (as shall be divulged below).

There were several plugins to be updated. I clicked the Update button, the updating proceeded, but it then STOP! The screen of my website (aka this one that you are reading) went totally blank!

My website went ‘dead’! Panic set in! “What the devil did I do?”, I asked myself.

Frantic search for the solution

Off I went to Google “wordpress site won’t load after update of plugins” and found several useful sites.

The best of these was one with a good advisory which gave more or less this message: “Don’t trust the Update button, do your plugin update one by one so that if you hit trouble, at least you can easily identify the culprit.”  So I learned that I had to do a lot more to overcome this outage. I followed the instructions given and here are the steps I took.

  1. I accessed the control panel (cpanel) of my website hosting.
  2. Using “File Manager” I traced my path to the public.html and found the folder with my WordPress installation.

  3. Diving deeper, inside my WordPress folder, I located the subfolder “wp-content” where it has a sub-subfolder called “plugins”.

  4. I renamed “plugins” to “brokenplugins”. Then created a new folder which I named “plugins”.
  5. I opened another tab on my web browser and tried my luck in accessing my website.  And it was back on! But as the “plugins” folder was empty, none of the plugins worked.
  6. I then went back to the “File Manager” and copied the plugins from “brokenplugins” to “plugins”, doing so one at a time. For each plugin that I copied over, I would go back to my website and reload to see if the newly copied in plugin caused any problematic files (aka corrupted files) that would crash the website.  All the plugins seemed to have uncorrupted files. But in this way of copying, all the plugins are still inactivated.
  7. Next step was for me to activate each one of the plugins, one by one. And I found the culprit! It was Caldera Forms. WordPress was good that it detected the problem and did not allow me to activate Caldera Forms.
  8. I deleted Caldera Form from the “plugins” sub-subfolder and I thought my problem was solved.

Removal of a plugin, removed content associated with it too!

Of course when you remove a plugin, the associated features and content would be removed too! In my case it was the contact form and order form. The latter actually was put in as “shortcode” on multiple pages of my website.

Once bitten, twice shy. I realized that I should have just used the “default” contact form from WordPress instead. I could also create a simple order form that served my needs from this too.

However, I noticed another issue!

I couldn’t load Elementor, the page builder plugin!

During earlier updating of Elementor and the third-party supporting plugins, I presume somehow the main Elementor editor was prevented from loading. Elementor is a very useful page builder plugin that takes that pain out of having to learn html coding for WordPress users like me. It allows users to do lots of web page design work using its standard elements which are supplemented by many third-party’s plugins too.

With Elementor not loading, although all the content I created using it was still showing, I was prevented from editing any content created with it. Hence I could not replace the forms previously made using Caldera Forms (and the ‘shortcodes” for these forms which remained after Caldera Forms was removed as a plugin were very glaring on the affected pages!).

Lot’s of advise on Google but …..

I found a lot of advisory via Google to tackle the Elementor plugin not loading issue. Well, at least I was not alone. One of these was from Elementor itself which gave instructions to change some settings. This did not work for me!

I then found another page from Elementor which advised that increasing the memory allocated to WordPress may solved the issue. But I would have to edit the associated php file, wp-config.php which was found in the main WordPress installation folder. I was a bit apprehensive about messing around with a php file but the instructions given by a different web page seemed to be showing that this was just a one-liner addition. So I increased my WordPress allocated memory to 128 Mb. But this did not bring back Elementor’s editor either.

I went back to Elementor’s support page and followed its advisory and proceeded to deactivate and reactivate each plugin in turn to see if any one of these was stopping Elementor editor from loading. I found out that the culprit was indeed a supporting plugin for Elementor, “Premium Addons for Elementor”. I could not even deactivate this plugin (after it was activated earlier). As such it would not be possible for me to just delete it via Dashboard of WordPress. I ended up having to remove the culprit using “File Manager”. However a warning message kept showing up at the Dashboard which warned about the missing “Premium Addons for Elementor”. Emptying the cache several times did not remove this message. [But after a reload of the website, on the next day, this message was gone!]

Again, I had to rewrite all the content that was created by the elements provided by “Premium Addons”.

Lessons Learned

  1. Never update plugins on WordPress en mass! Do it one at a time so that if something fouls up, at least you can pinpoint the culprit!
  2. If you create forms using a third-party plugin, such as Caldera Forms, it is best to have at least a screenshot of the form so that you can recreate the content if things go wrong and you have to remove the offending plugin.
  3. Always keep a copy of the content that you create with Page Builder and its supporting addons plugins. You will lose the content if you have to delete the addon plugins or the  main Page Builder plugin.
  4. You should keep life simple. Non-design heavy content, such as a blog page like this should be presented using the “native” WordPress editor. This will save you from a lot of headache and work which using a Page Builder will cause should the same page building plugin has to be deactivated or removed.

Telegram: solving registration problem on mobile via desktop version

[show_post_categories show=”category” hyperlink=”yes”]

[show_post_categories show=”tag” hyperlink=”yes”]

I was on Facebook Messenger chatting with my old friend, ex-colleague and fellow parent-teacher-association pioneers of SJK(C) Tun Tan Cheng Lock (Chinese primary school), Dr. Margaret Liew today. She lives in the USA & told me that I could get her on Telegram much more readily than FB Messenger. She did not like Whatsapp because she gets too many messages especially from groups that might mask/push down friends’ crucial messages.

Off I went to put back Telegram on my Android powered Xiaomi Note 3. The installation via Google Play was fast and event-less. But I got stuck when I tried to register my mobile phone with Telegram’s server. “member_occupy_primary_loc_failed” was played out. I repeated the registration, getting yet another SMS with the required code from Telegram’s server and yet there was the same error message. Then I proceeded to reboot my mobile phone. Same frustrating error message came out. Then I remember, this was the very reason for me to give up on Telegram in the first place.

Not being a person who gets defeated so readily, I went on Google to find clues on how to solve this “Telegram mystery” and was somehow pointed to a site (I guess it is Telegram’s own) that provided desktop versions of the mobile messaging software in API format. There, I found not only the usual Windows version of the desktop app, there were even 64 and 32 bits for Linux too.

I use LXLE, a lighter version of the popular Linux distribution named Ubuntu (yeah, I prefer Linux which is faster and safer to Windows and my older computers can run just as fast as the new ones on LXLE). Of course if you are using Windows, the .exe file that you can download will self install when you click it and you need not bother with fiddling with the decompression of the file etc. set out below for Linux users.

I faced a slight problem. The Telegram API for Linux did not come in the easily installable format of “.deb” which I could just download and click (much like the “.exe” files for Windows). Instead it was a compressed file that needed me to use the terminal and commands to decompress and activate. After several sites which gave me the wrong instructions, I found a site that gave the correct instructions. I followed the “old fashion” way as listed in this site and viola, Telegram Desktop version was working on my laptop.

Good, clear & concise instruction to handle compressed file to install Telegram api.

I then proceeded to successfully register for an account with Telegram’s server after giving my mobile number. This solved the issue of registration. But it still did not solve my problem with registering Telegram on my mobile phone. Just when I was about to give up, I received the first message from Telegram itself. There was a code given that I was instructed to use on my mobile phone to link both the desktop and mobile versions of the app. The moment this code was keyed into my mobile phone’s Telegram app, the problem was solved. Telegram actually worked on my mobile!

screenshot-telegram-msg
A message with a linking code was sent to the desktop version for me to link up this account to my mobile app… Problem Solved!

For Whatsapp users, Telegram has most of the features that one will need including Groups, profile etc. What it has that is a bit unique is the feature to allow one to put in a username. It will generate a link that you can share with your contacts. This comes handy if you are not willing to give your mobile phone number to someone and it makes adding new contact very easy. In my case I did not have Dr. Liew’s US mobile number and I just use FB Messenger to share my username link with her and 10 seconds later we were connected!

The desktop app for Linux means that unlike Whatsapp, I do not need to open a tab on my browser each time I switch on my laptop and do the QR Code scanning etc., this makes using Telegram on desktop that much easier.